Books by Melissa Bowersock

Monday, June 25, 2012

To Self-Publish or Not Self-Publish


In many of the online forums I follow, the debate rages on about whether or not to self-publish. Due to the nature of these forums, there is a constant influx of new writers that are investigating their options, so the question comes up over and over. Many of us “old timers” chime in, but the experiences, suggestions and opinions range over hundreds (even thousands) of posts and sometimes the kernels of information are hard to glean out of the noise. I decided it was time to distill the discussion down to a few concise bullet points.

Before I start, though, I want to say something about the psyche of the writer. We are artists and what we do is very subjective. There is no sure-fire formula for success; if there were, EVERY book written would be a best-seller. The fact is, no one has been able to identify what makes a book capture the public’s attention and take off like wildfire. No one. Not us writers, not publishers, not agents, not even readers. It is, and will always be, a mystery.

That said, writers—because their work is subjective and creative and highly personal—are often plagued by fragile confidence. When we offer our latest story to someone to read, we are offering up a creation from our heart, a child, a piece of our very essence. When a reader tosses it off as ho-hum or even not worth the paper it’s written on, our egos take a direct hit. Just because of the nature of what we do, we are vulnerable. I believe it’s this vulnerability that makes us an easy target for the age-old sales pitch lobbed by the traditional publishing industry. They’re the experts. They know what good writing is. They know what will sell. They can help us.

With all due respect—bullshit. If they’re experts in crafting and promoting good books, wouldn’t they be writing best-sellers themselves? Ok, maybe they don’t have that creative spark, that fire in the gut that makes us writers write. But if they were such great experts, wouldn’t every book they publish be a best-seller? They couldn’t give away Sarah Palin’s last book. No, the fact of the matter is that traditional publishers base their decisions on (1) personal opinion and (2) trying to mechanize and formulate a very nebulous and protean quality. It can’t be done. And if that’s true, how is anyone an expert?

My point is, traditional publishers have been pushing the mythology for centuries that writers need them, need their expertise, need their services, need their guidance. And many writers believe that. But you know what? It’s not true. The self-publishing phenomenon is proving it false. All writers need now is (1) faith in themselves, in their talent, in their art, (2) the confidence to set out in a new direction and (3) the discipline to do the work and craft a good story in a professional manner.

Easy.

So what are these “professional services” that traditional publishers insist we writers need and can only get from them?

      Editorial support – As I blogged about in an earlier entry, my first five books were published by traditional publishers. Of those five books, only one publisher ever offered a single editing suggestion. The other four books were published verbatim, exactly as I sent in the manuscript, a handful of typos and misspellings and all. Two of these books were published by a well-known NY house. (I have since regained the rights to all of these books, corrected the errors and self-published them.) I have heard, although this is not my experience, that PublishAmerica’s “editing” process consists of going through the manuscript with a spell-checker, sometimes changing the author’s intended words to different words, even changing character’s names if the intended name did not exist in the spell-checker’s dictionary. How helpful is that?

     Marketing support – Most writers believe, mistakenly, that a traditional publisher will promote their books with book signings, advertising and splashy promos. In a word, no. My first two books, published by the NY house, appeared in drug stores and supermarkets but not in book stores. I never saw one speck of advertising except for the reviews that I solicited. The other three books, published by small presses, were showcased on the publishers’ websites, but it was up to me to drive traffic to those websites. I had one editor who, many months and even years after publication, would send me e-mails about radio programs that wanted to interview authors (and it was up to me to contact them), but beyond that—zilch.

     Packaging – Traditional publishers think in genres, and their definition of a genre is pretty narrow. I’ve gotten more than a few rejection letters because my stories didn’t fit into nice neat pigeonholes and, frankly, the publishers would not know how to package them. But when they do accept a story, they know the genre, know the formula to 
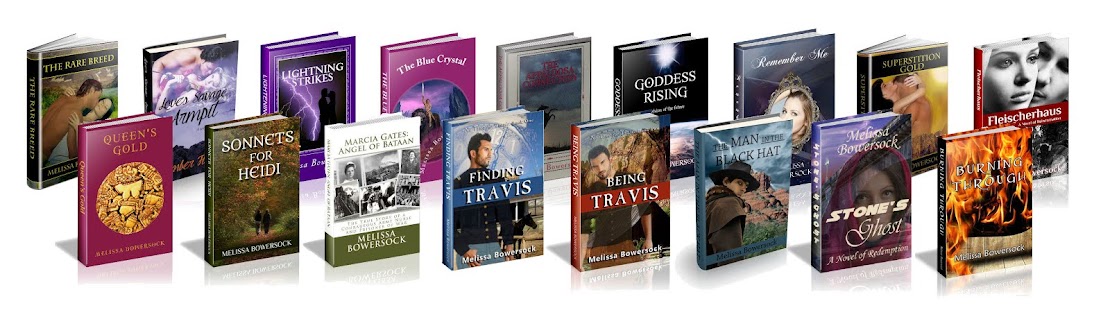
package that sort of thing and they do it—ad infinitum. My first book, a historical romance about a half-breed woman, was titled The Rare Breed. Oh, waaaay too tame. They changed the name to Love’s Savage Destiny and slapped a sweeping, swooning, love-on-the-prairie cover on it and called it done. My second book, a western romance set amid the Superstition Mountains of Arizona, was called Superstition Gold. Oh, can’t have that—Superstition denotes the occult. They changed the title to Love’s Savage Embrace, slapped on a similar swooning cover and called it done. I always swore I’d write a book one day called Love’s Savage Armpit.

Cover art – Publishers used to have a lock on cover art, but no more. There are scads of artists and designers getting into the cover art business; just do a Google search on “book cover art” and you’ll be inundated by the returns. Many of these do very slick, professional layouts and many of them are very affordable.

So it’s no longer true that traditional publishers offer anything that can’t be gotten via other avenues. But is that enough to steer you to self-publishing? Obviously no one process is a good fit for everyone. Here’s a brief list of pros and cons.

Pros of self-publishing:

    Total control – As a self-publisher, you control 95% of the look and feel of the book. You set the title, decide on the size of the book and the cover art, write the blurbs and set the price. Since you have not sold your rights to a middleman, you can change your mind about any of these any time you want. You are no longer at the mercy of someone else’s idea of what your story is. 

     Higher royalties – Since there is no middleman, you don’t have to share the royalties. I publish with Create Space, which tells me how much the printing costs are associated with my book, then I set the retail price based on that. If the cost per book is $6, I’m then free to set the price at a modest $7 or a more hefty $12 or more. Personally, I like to keep my books affordable; I’ve never been into price gouging.

     Affordable – Due to the improvements in digital publishing and in the print-on-demand (POD) process, you can essentially self-publish for free. You read that right; free. With Create Space, all you are obligated to buy is one proof copy and shipping. (You might even be able to avoid that if you’re willing to trust the digital proof you see on the screen. Personally, I would not recommend that.) With POD technology, the books are printed as they are ordered and pay for themselves so there are no up-front costs, no large print runs, no mass shipping and warehousing. Create Space does offer a one-time upgrade (about $25) which allows you to put your book into expanded distribution, and is well worth the money. They also, of course, offer all sorts of editing help, cover art, etc., all on a cafeteria basis. You can buy as little or as much as you like.

Cons of self-publishing:

     Doing all the work – Yes, you do all the work. That means that once you’ve written the book, you then have to decide what size you want the book to be, you have to format your file to fit that page size, format the page numbers, the headers, footers, margins, chapter headers, images, cover design. Very often this detailed computer stuff is at odds with the creative process of writing, but if you’re not up on all the technical aspects, you can certainly hire someone or get your teen-aged kids to help you out.

     Doing all the marketing – Yes, you must do all the marketing. Create Space will upload your completed book both to its own storefront and to Amazon.com; if you choose the expanded distribution, your book will be featured in other online bookstores and outlets. This is all well and good, but if no one knows your book is there, it’s useless. It’s now up to you to drive traffic to Amazon or your own website. How do you do that?

Get your own website. There are a ton of hosting companies online, and hosting has gotten cheaper over the years so now it’s very affordable. Just Google “web hosting service” and you’ll get tons of hits. General consensus is to create your website around you, not your book. Many writers have crafted a website based on their first book, only to do something completely different with the next book and then have to start over. If you craft the site around you, the author, you can accommodate multiple titles and genres.
Use social media. Yes, I mean Facebook and Twitter and all the online forums. Kristen Lamb has written an excellent book called We Are Not Alone (WANA) about how writers can use these sites to your best advantage. It’s worth the read.
Promote your book whenever you can. Talk to your local bookstores about setting up a signing, register for library fairs and book fairs. Create a press kit and send press releases (and/or a physical copy of the book to review) to your local newspapers and TV stations. Peruse online forums like LinkedIn and Goodreads; there are a lot of other writers that offer guest appearances on their blogs or that offer reviews. Again, Google “book reviews” and you’ll get a lot of hits.
Sell by not selling. I know, this sounds counter-productive, but most people don’t like being sold to. I blogged about this a while back. Instead of button-holing people and crying, “Buy my book,” participate in online forums, in the social media by getting involved in conversations. Chat with your potential readers. If there are groups, clubs, organizations that are concerned with issues you raise in your book, volunteer to share your own expertise or research. Share what you know. Put yourself out there and get to know your reading public. People will be more inclined to buy from someone they feel they know and with whom they share a commonality.

This is only the tip of the iceberg. Marketing is difficult and it takes a lot of time, but if you want to get your story out there, there’s no other way. Believe me, when you start to really connect with readers out there, when they start sharing their stories with you and buy your book because they’ve enjoyed meeting you—it’s worth every bit of effort you’ve put into it.

Good luck!

Thursday, June 7, 2012

Formatting for Self-Publishing: Part II


I think we’re all agreed that MS Word is not the most author-friendly software for formatting long manuscripts. It tries, it really does, but sometimes the “automatic” frills create more problems than they solve. However, that said, there are ways to use Word to get the results that you want. I am using Word 2010, which is quite different from the earlier versions, so if your screen doesn't look like the screenshots below, you probably have an earlier version.

Please keep in mind that this is a bare-bones, no-frills walk-through of formatting. Word has a lot more features than I am discussing here, so you can get pretty fancy with it, but for those who are relative newbies to Word or are not terribly computer-literate, this should give you some basic options for making your book look professionally typeset. For basic formatting of your page size, see my earlier blog. Once you have the page format set up, you can attend to the details here.

One thing to remember, though, is that there are no hard and fast rules about a book’s format, and much of it is largely personal choice. If you doubt that, go through a shelf of your own library and check the books there for page number locations, footers, headers, font, chapter titles, etc. You’ll probably find a wide variation. If you see a format that you like, it’s easy enough to use that for your guide and make your book look similar.

That said, please remember also that―as with all things computer―there are 10 ways to do anything. I’ve learned to do these things my way; that doesn’t mean it’s any better than any other, it’s just the way I learned it. Some people are better with keyboard shortcuts or have other ways to do the same thing. All these processes are just options, not the only way.

Page Numbers: There are several ways of showing page numbers. The very simplest is to center your page number in the footer at the bottom of the page. A second, slightly more complex way is to put your page numbers in the header with the odd page numbers (right-handed page) right justified to the outside of the page and the even page numbers (left-handed page) left justified to the outside of those pages. I’ll address that style of page numbers in the section on Headers, below.


To put your page numbers at the bottom of the page, click on your Insert button on the top tab menu (see above), then go to Page Number in the Header & Footer section just below the ribbon menu. You’ll see a small down arrow indicating a dropdown box. Click on that arrow and you’ll get several options for placement: Top of Page, Bottom of Page, and some other items. If you simply move your mouse so it sits on Bottom of Page, another dropdown menu will appear. There you’ll see, under Simple, Plain Number 1, Plain Number 2 and Plain Number 3. These will insert the page number into the footer at left edge (#1), center (#2) or right edge (#3) respectively. By Simple, it just means the page number and nothing more. Below the Simple options you’ll see Page X options, which is just another type of format, i.e. Page | 1 or 1| Page, each with 2 placements, left or right.  See below.


One you have your page number inserted in the place you want it, you can then highlight the page number, click on the Home tab of the top menu and change your page number’s font style and size, if desired. Changing the size or style of the first page number will cause all the page numbers throughout the document to change as well.

Headers: The headers of most fiction books contain either the title of the book and/or the name of the author. You can get more detailed and perhaps show the chapter title or discussion subject, but that sort of thing is more often done in non-fiction or academic works.

Double-click in the area of your header, in the white space above the top line of the page. When you do that, all the text in the main body of your page grays out and you’ll see dotted blue lines that delineate the header (and footer) area for you (see below). Simply click your cursor in the header area to anchor it, then type in the title of your book. If your cursor was not already centered, you can center it by clicking on the center button at the top of the window under the Home tab and in the Paragraph section.


If you want the book title in the header on the right-hand pages and your name in the header on the left-hand pages, that’s easy enough to do. Click on the Page Layout tab on the ribbon index at the top of the window. In the section titled Page Setup, you will see a small arrow in the lower right-hand corner of the section. Click on that arrow to get more options (see below). A dropdown box will appear with 3 tabs. Click on the Layout tab and you will see an area for Headers and Footers, just beneath the Section area. Click on the box next to Different Odd and Even. You may also click the box next to Different First Page and that will remove the header from the first page of your document.


Now that you’ve told Word you want different headers on odd and even pages, you may click on OK and get rid of the dropdown box, returning to your document. Go to the header section of your second page (probably page 2 and a left-hand page of the open book) and type your name in the center of the header. Your entire book will now have the book title on every odd (right-hand) page and your name on every even (left-hand) page.

If you want to have the page numbers in the header as well, you can put them on the outside edge of the respective pages. Using the Insert tab of the top ribbon menu, select Page Number and choose either the left justified or right justified, whichever works for the page you’re on (right justified for the even pages, left justified for the odd). This may wipe out your book title or author name that you’ve already put in, but not a problem. Just move your cursor back to the center of the header area and then type in your book name or author name. As before with the page number at the bottom, you can change the size or font style of your book name, author name or top page numbers simply by highlighting them and choosing different options in the Home menus. Now your document should look something like this:


Footers: Unless you’re going to have a lot of footnotes or references, the footer will primarily be used for the page number, if at all. See Page Numbers, above.

Font: Fonts are styles of type and can range from very simple and straightforward to wildly expressive. There are two basic types, footed and non-footed. Footed means letters with the small jutting edges at the base, like this type (Times New Roman). Non-footed means type without those little additions, like this type (Arial).  It’s generally thought that footed fonts help the eye to flow along the text, those little edges leading the eye from one letter to the next. Again, however, it comes down to personal preference and there are no hard rules about it. You will also notice that, although both the samples above are size 12 type, the Arial looks larger and is easier to read because the height of the lower case letters is taller. As you can see, there are a lot of variables about type. Try several and see how you like them. Below are a few samples of the most widely used.

Times New Roman                                                                 Arial
Garamond                                                                               Verdana
Cambria                                                                                  Trebuchet
Courier                                                                               Calibri

Chapter titles: To number or not to number? The simplest way to title chapters is by far just to number them: Chapter 1, Chapter 2, etc. It’s your choice if you use Arabic numbers (1, 2, 3, etc.) or Roman numerals (I, II, III, IV, etc.), or spell out the number (Chapter One, Chapter Two, etc.). Other methods for titling chapters are to give them a brief description (Time Goes On, Murder at Midnight, etc.). I’ve also used dates for chapter titles when the action is continuous and the story unfolds in real time with no large gaps.

Chapter position: Looking back through the books in your own library, take a look at how the chapters start. Do they start at the top of the page? Maybe a quarter of the way down the page? Or halfway down? This is again purely personal preference. I like to start mine about one third of the way down from the top. I think it gives it a cleaner look and for anyone who is flipping through the book looking for the last chapter they read, it’s easy to identify the chapter beginnings quickly.


Drop Caps: Drop caps are usually large, sometimes decorative first letters of a chapter.  (See above.) As with the chapter title, they identify the beginning of the next phase of action and can give the page an elegant look. To add a drop cap, simply highlight the first letter of the sentence, then go to the Insert tab on your top ribbon menu and click on the small arrow beside Drop Cap in the Text section of the menu. You’ll get three options: None, Dropped, or In Margin. Dropped is what you see in the sample above. In Margin means the large capital is not indented as above, but is actually placed in the margin to the left of the rest of the text. If you choose this, you should remember that physical books require a gutter, a bit more white space in the inside margin closest to the spine to make sure the text is still readable where the pages are attached to the spine.

Once you’ve chosen your drop cap, you can then highlight the single letter and change the size, color or font style as you like.


Blank pages: Some books will be formatted so the chapters always start on an odd (right-handed) page. Others will start a new chapter on the immediate page following the last page of the last chapter. I’ve also seen chapters start just a few lines after the ending of the last one (even in the middle of the page), as well. Again, it’s all personal preference, or perhaps in this case, it could be a matter of page count. If you’re trying to keep the page count down, you can opt for one of the space-saving options. If you definitely want your chapters to start on an odd page, you will often need a blank page before it if the last chapter ended on an odd page.

Sections: Sections can be confusing, but they can also be very helpful. In Word, you can create a section in a document anywhere you want, of any length and over any number of pages. Why would you want to do that? There could be several reasons. Your story might be one that combines two narratives, say from two different characters, and you might want to visually show the difference between the two. You could set up different sections for each, with different margins, different fonts, different size type. It would be immediately visible that the story-telling was different from one section to another. Another use is to set your chapters up as different sections in order to take advantage of what we learned above about headers. Setting your chapters as separate sections means that the first page of each section (chapter) will now have the Different First Page option in the Header layout and your chapter pages will not have the header information that the other pages do. This keeps all the chapter pages clean, not just the first one.


To create a section (just one of many ways), go to the last line of your first chapter. Place your cursor beyond the last period of the last line, then go to the Page Layout tab of the top ribbon menu. You’ll see a menu item in the Page Setup section that says Breaks with a small down arrow next to it. Click on the down arrow and you will see a dropdown box of options (see below). The first three options are Page Breaks; the second four are Section Breaks. I’ve found it easiest to choose the Next Page option, starting the new section at the top of the next page (which will be the beginning of your next chapter). This action also combines a Page Break into the mix, which means that if you should happen to reformat your document and choose different margins that lengthen or shorten the page count, the chapter page will always be on a separate page from this last page where you started. I find this keeps the book clean and organized.


Now, after you’ve created the new section, place your cursor inside the new section and anchor it there with a click (doesn’t matter where). Now go to the Page Layout tab of the top menu and click on the little arrow to the right of Page Setup. You’ll get that same dropdown box with the three tabs; click on layout as before and click the box next to Different First Page (and Different Odd and Even if you’re doing that format in your header). Now go to the bottom of the layout box and you’ll see an entry that says Apply to: and has a dropdown box there. Click on the arrow and choose This Point Forward. This is what tells Word that you want this page to be the first page of the new section and therefore the header/footer will be different than the rest, i.e. no header/footer on this page as on the others.


We’ve covered a lot of details here so I hope it hasn’t been too overwhelming. If you have any questions about any of this, leave me a comment and I’ll answer to the best of my knowledge. If you find Word confusing or frustrating, there are a lot of good help forums online and a lot of good after-market books that can walk you through the features. Once you bug out your particular layout issue once, it gets easier next time around.

Happy formatting!